Saturday, September 15, 2012

Angel Heart Beaded Bookmark GIVEAWAY!

My Creative Mommy is really growing, and to show my appreciation I'm going to give away today's absolutely beautiful Angel Heart Beaded Bookmark to one lucky My Creative Mommy follower! Here's how it works...
  1. Become a follower of My Creative Mommy's blog by scrolling down the right side of this post until you see where it says "Join this site," then sign up to become a member/follower of my blog.
  2. Leave me a comment letting me know you joined and that you're now a member/follower of My Creative Mommy's blog (and anything else you'd like to tell me).
  3. If you are already a member/follower, just leave a comment.
It's that easy!
I will pick one winner at random Friday, September 21st 2012 at 9:00pm Eastern Standard Time (USA), and announce the winner in my blog post on Saturday, September 22nd 2012.

Materials for the Angel Heart Beaded Bookmark can be found at Fire Mountain Gems and Beads or eeBeads. Both have great websites and customer service.

Now let's get started making the Angel Heart Beaded Bookmark, here's what you'll need:
  • Assorted beads and charms
  • Crimp beads (3 by 2 millimeter)
  • Basic jewelry tools - round nose pliers, wire nipper, crimping pliers
  • Beading wire (I used Accu-flex 49)
  • Metal shepherd's hook bookmark (around 5 inches)
Cut three strands of wire twice as long as your desired length. It is better to have too much wire and trim the excess, than to not have enough! The crimp bead is the tiny cylinder shaped bead in the middle of the wire in the picture below.


Next you will run each of the three strands of wire through the crimping bead. Then thread the three strands of wire through the hole in the shepherd's hook. Last, loop them around and back through the crimping bead.   You will now have a total of 6 strands of wire in that little crimping bead. When you're finished it should look something like the picture below. 
Holding the crimping bead and shorter strands of wire, tug on the longer strands, sliding the crimping bead closer to the shepherd's hook. You want it close, but not too snug - this will allow the beaded strands to dangle freely.

Take your crimping pliers and squeeze them closed over the crimping bead to lock the wire in place.

Then snip the ends of the shorter strands of wire with the wire nippers. Do not snip the wire flush with the crimping bead. Instead leave enough to tuck into the first bead or two so no sharp edges are exposed.

Time to let your creativity flow! Starting with your first strand of wire - lay out the beads on a pillow case or towel in an arrangement you like. The towel keeps the beads from rolling around.

Keep at it until you're happy with the way they look, then thread each bead on the wire. 
After your last bead, thread on one crimping bead. Then thread the wire through the loop on your charm and back up through your crimping bead, crimp and snip just like you did when you attached the wires to the shepherd's hook. 

Repeat the entire process of beading, crimping, and snipping with the other two strands of wire. You may want to vary the lengths of the wire for a different look. You can also just use one or two strands of wire for your bookmark.
Great job!
Your finished bookmark will be so beautiful you'll want to ditch that e-reader and pick up a nice leather bound classic!


Special thanks to my Mama for her technical expertise on this project, and for nurturing my creativity long before I even knew it was there : )

Visit us on Facebook at http://www.facebook.com/MyCreativeMommy and get regular updates by clicking the "Like" button while you're there.

Follow us on Pinterest at http://pinterest.com/mycreativemommy

I want to offer many thanks to all my readers in 28 different countries - the United States, Canada, Germany, Australia, the United Kingdom, Russia, France, Malaysia, Italy, the Bahamas, the Philippines, Sweden, Egypt, Columbia, the Netherlands, Spain, the Sudan, Turkey, Mexico, Moldova, Denmark, China, Vietnam, Singapore, Thailand, the Czech Republic, the Ukraine and South Africa!
It is both humbling, and exciting to know people are actually reading what I'm writing, and hopefully trying out a few of the projects.

My goal is to take the whole world on a creative journey, one project at a time! Thanks for coming along.

Many Blessings,


Jana : )


Saturday, September 8, 2012

Autumn Leaves Picture Frame

I love everything about Autumn. 
Autumn is my favorite season and if I could locate the land of eternal Autumn, I'd move there. I find the colors of Autumn beautiful and very comforting, and they show up all over my life. So naturally, I could hardly wait to start Autumn themed projects. 
Today's project uses an Arnold Grummer photo frame kit, and Autumn colored leaves made from handmade paper. Handmade paper has a wonderful texture and welcomes metallics and botanicals in the paper making process. The beauty and usefulness of handmade paper is only limited by your creativity.

Here's what you'll need to make the Autumn Leaves Picture Frame:
  • 4 sheets of 5 1/2 by 8 1/2 inch handmade paper
  • Arnold Grummer Photo Frame Kit
  • Elmer's glue/glue stick
  • Leaf or Autumn themed templates (cookie cutters work too)
  • Scissor
  • Pencil
Follow the directions on the Arnold Grummer Photo Frame Kit to cover and assemble the picture frame.

Then take the leaf templates and trace them on the wrong side of your sheets of handmade paper, then carefully cut the leaves out.


Now arrange the leaves attractively around the picture frame. This may take a few tries to get the look you want.

Once you are happy with the look of your frame you can glue the leaves to the picture frame. Leave it to dry over night. It wouldn't hurt to lay a piece of wax paper over the whole thing and then put a heavy book on top to add some pressure while the glue dries.

I have intentionally left the stand off the picture frame, and left the inside of the frame neutral, so you can see the face of the finished picture frame without distraction. 

Another great idea for an Autumn look would be apples, or pumpkins. I hope you liked this fun, and easy project and will try it out for yourself!


*Stay tuned for September 15th's blog post. One lucky reader will be able to win the project I make next Saturday in a special giveaway drawing! 

I enjoy interacting with my readers so feel free to leave comments or questions on my blog.
Be sure and share My Creative Mommy's blog posts with all your friends to help us grow, and please sign up as a member to follow my blog.

Visit us on Facebook at http://www.facebook.com/MyCreativeMommy and get regular updates by clicking the "Like" button while you're there.

Follow us on Pinterest at http://pinterest.com/mycreativemommy

I want to offer many thanks to all my readers in 22 different countries - the United States, Canada, Germany, Australia, the United Kingdom, Russia, France, Malaysia, Italy, the Bahamas, the Philippines, Sweden, Egypt, Columbia, the Netherlands, Spain, the Sudan, Turkey, Mexico, Moldova, Denmark, and China!
It is both humbling, and exciting to know people are actually reading what I'm writing, and hopefully trying out a few of the projects.

My goal is to take the whole world on a creative journey, one project at a time! Thanks for coming along.

Many Blessings,

Jana : )

Saturday, September 1, 2012

Homemade Dog Biscuits! What A Treat!


I have been following the pet industry market for years, and I continue to be amazed by its consistent, explosive growth. According to the American Pet Products Association, in 2012 it is estimated that $52.87 billion (yes, BILLION) will be spent on our pets in the United States. So if you just love your pet, or if you are looking for a great market to start selling handmade goods, today's project on how to make dog biscuits will be a good resource for you. 

This is our dog, and he is my inspiration for this blog post. He is such a good dog, he deserves tasty homemade treats. We adopted him from Garden State German Shepherd Rescue when he was just a puppy. If he didn't shed, he'd be downright perfect. This one's for you boy : )
 
Here's what you'll need to make homemade dog biscuits:
  • A mixer. You could do it by hand though, if you don't have a mixer.
  • 1 1/2 cups of all-purpose flour
  • 3/4 cup oatmeal, uncooked
  • 1/4 cup wheat germ
  • 1/4 cup chunky or creamy peanut butter
  • 1/4 cup vegetable oil
  • 1/4 cup honey
  • 1 teaspoon baking powder (NOT baking soda)
  • 1/2 cup water
  • Dog-bone shaped cookie cutter, or other fun shapes your pup might like.
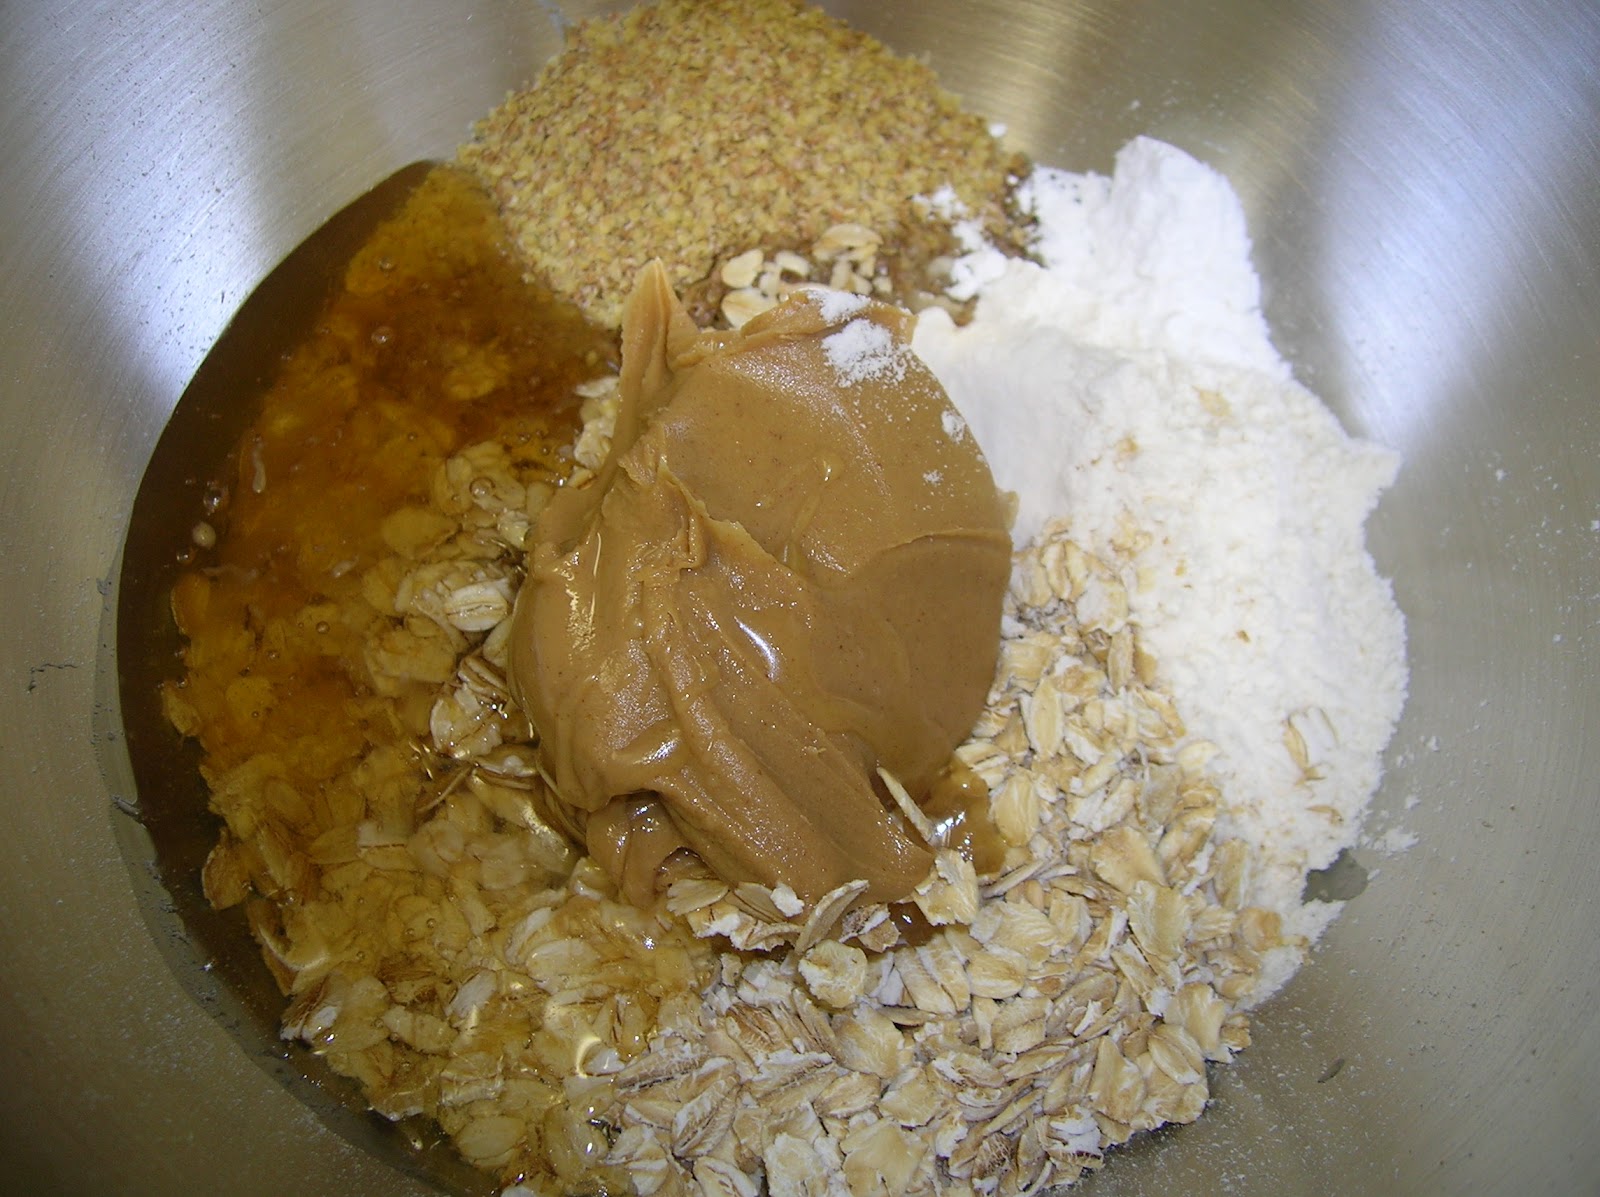
Preheat your oven to 350 degrees Fahrenheit. In a large bowl, combine 1 cup of flour with remaining ingredients until well blended. Then add in the last 1/2 cup of flour and mix together.
*Tip, when measuring the peanut butter, oil and honey, measure the oil first. Then after you pour the oil out, measure the peanut butter in the same measuring cup as the oil. Repeat with the honey. By measuring the oil first, the measuring cup is slippery and makes it easier to get the peanut butter and the honey out of the measuring cup.
 
 
Now that all the ingredients are blended together, with floured hands and a floured surface, knead the dough until the dough holds together well.
 

Roll out dough till it is about 1/4 inch thick. I use a rolling pin by Wilton, but in a pinch I've used a wine bottle to roll out dough!
Take your bone-shaped cookie cutter and cut out as many bones as possible. Reroll your scraps and cut out more bones till you're out of dough.

 
Carefully pick up the bone-shaped cutouts and place them on a large ungreased cookie sheet. You don't have to leave much space between them, they don't really spread out during baking. Bake for 20 minutes, turn off the oven and leave the cookie sheet in the oven for an hour or so - this will make them crunchier.
 
Take the cookie sheet out of the oven and remove the dog biscuits. Place on a wire rack till completely cool. Sometimes I just leave them on the cookie sheet for a few hours  - makes less dishes to clean up. When cool you can store your awesome dog biscuits in an airtight container, or freeze any you're not using right away.
This recipe was adapted from Good Housekeeping magazine and has been used by our family for over 15 years. It makes about 2 1/2 dozen dog biscuits. I usually double or even triple the recipe.
The oatmeal and the peanut butter give these dog biscuits a wonderful texture, and they smell so good while they're baking that your family will be asking to try them - and they can because they contain healthy, all natural ingredients suitable for people or pets!
 
 
I enjoy interacting with my readers so feel free to leave comments or questions on my blog.
Be sure and share My Creative Mommy's blog posts with all your friends to help us grow, and please sign up as a member to follow my blog.

Visit us on Facebook at http://www.facebook.com/MyCreativeMommy and get regular updates by clicking the "Like" button while you're there.

We're also on Pinterest at http://pinterest.com/mycreativemommy

In the short time since I started My Creative Mommy, we have had over 1200 pageviews from 17 different countries. I want to offer many thanks to all my readers in the United States, Canada, Germany, Australia, the United Kingdom, Russia, France, Malaysia, Italy, the Bahamas, the Philippines, Sweden, Egypt, Columbia, the Netherlands, Spain and the Sudan! It is both humbling, and exciting to know people are actually reading what I'm writing, and hopefully trying out a few of the projects.

My goal is to take the whole world on a creative journey, one project at a time! Thanks for coming along.

Many Blessings,

Jana : )


Saturday, August 25, 2012

Favorite Things Fan Book With Pumpkin Spice Paper


I try to surround myself with things that inspire me, bring me joy, comfort me, and make me peaceful. Whether they be photos, quotes, blessings, scents - I keep them close, a special place of respite and renewal, safe from the chaos of this world.

Today's project is based on that idea. A little book filled with good things, like favorite Bible verses, and special blessings - formatted in an easy to read "fan" style.
The paper is handmade, and infused with pumpkin spice tea leaves for a comforting, warm and spicy scent. I used the Arnold Grummer Papermill Complete Kit and a few Bigelow Pumpkin Spice Tea bags to make the handmade paper.
For a basic tutorial on how to make handmade paper, go to the Arnold Grummer Papermaking Blog and let Mr. Grummer show you how easy it is. While you're there visit the Arnold Grummer website, and take advantage of the BEST DEAL of the summer - 15% off your entire order! Sale items excluded. Use promo code AGIS89 at checkout. Hurry, sale ends Aug 30!

Let's get started. Here's what you'll need:
 
 
Several sheets of handmade paper 5 1/2 by 8 1/2 inches. I used 7 sheets.
Hole punch
Post screw. I used 1/2 inch aluminum screw post.
Pencil
Stamps
Ink pad
Glue stick
Some favorite things that make you happy! Flowers, photos, quotes etc.

Next, fold your papers in half, short end to short end and score them, then tear in half carefully. Now your one 5 1/2 by 8 1/2 sheet has become two.

Take each of your two new sheets and fold them in half LENGTHWISE, and score them. Then carefully tear them in half lengthwise. Your original 5 1/2 by 8 1/2 sheet has now become four long rectangular pieces. Do this with all of your 5 1/2 by 8 1/2 sheets of paper.

You should have a pretty little stack of papers looking something like this...

Ok, time to grab a sheet and punch a hole in the center of one of the ends. Then use it as a template to punch holes in the rest of the sheets of paper.

Now stack your papers so the holes align and slip the post part of the screw through the holes in the paper. Then screw the screw part into the post snugly and your fan book is assembled. Screw posts come in different sizes depending on how thick your stack of papers is.
Ok, get out your favorite things and stamp, paste, and write till your pages are filled with everything that makes you happy : )
Here are a few pages from mine...
 

I enjoy interacting with my readers so feel free to leave comments or questions on my blog.
Be sure and share My Creative Mommy's blog posts with all your friends to help us grow, and please sign up as a member to follow my blog.

Visit us on Facebook at http://www.facebook.com/MyCreativeMommy and get regular updates by clicking the "Like" button while you're there.

We're also on Pinterest at http://pinterest.com/mycreativemommy/my-creative-mommy/

In the short time since I started My Creative Mommy, we have had over 1000 pageviews from 15 different countries. I want to offer many thanks to all my readers in the United States, Canada, Germany, Australia, the United Kingdom, Russia, France, Malaysia, Italy, the Bahamas, the Philippines, Sweden, Egypt, Columbia, and the Netherlands! It is both humbling, and exciting to know people are actually reading what I'm writing, and hopefully trying out a few of the projects.

My goal is to take the whole world on a creative journey, one project at a time!

Many Blessings,

Jana : )
Saturday, August 18, 2012

Quick And Easy Homemade Freezer Jam With Farm Fresh Fruit


One of my favorite things about being a Jersey Girl is the cornucopia of locally grown Jersey Fresh fruits and vegetables available. Growing up I marveled as I watched my Mom turn baskets of produce into dozens of beautiful glass jars filled with preserved fruits, vegetables and jams. They would be lined up on our basement shelves bringing our family a taste of summer all winter long. Now I'm the Mommy, and it's my opportunity to share this wonderful life skill with my children, and with you. Fortunately, my Mom is close by in case I get jammed up (pun intended!). With the diminished economy, an increased interest in emergency preparedness, and a desire to embrace a simpler life, home canning has seen a resurgence, and the undisputed go to place for information on home canning, drying and preserving is Ball's Fresh Preserving. Home canning supplies are readily available online, in grocery stores, hardware stores, and even the big stores like Walmart and Target.

Since I have an abundance of sweet, juicy nectarines and organic blueberries we'll be making Lemony Blueberry-Nectarine Freezer Jam from the Ball Blue Book Guide to Preserving.  Freezer jam is a great way to get started in preserving because it's quick, easy and fun, and absolutely anyone can do it! You will gain instant rock star status when you tell your friends you made your own homemade jam.

Here's what you'll need:
  • 3 cups chopped, pitted, peeled nectarines (about 4 medium)
  • 1 cup of crushed blueberries (about 1 pint)
  • 1 tablespoon grated lemon peel
  • 1 teaspoon lemon juice
  • 1 1/2 cups of sugar
  • 5 tablespoons of Ball Instant Pectin
  • 5 half-pint freezer jars
After you crush the blueberries, and peel, pit and chop the nectarines, grate a tablespoon of lemon peel and squeeze a teaspoon of lemon juice. Now combine those first four ingredients in a medium sized bowl and give them a stir. I like jam with pieces of fruit in it, but I zapped the mixture in the blender to smooth it out a bit because my kids are suspicious of any food with lumps or chunks in it.

In a smaller bowl, stir together the Ball Instant Pectin and the sugar, making sure there are no lumps left . Don't be tempted to use a different type of pectin you might have on hand. The Ball Instant Pectin does not require cooking and is not interchangeable with other types of pectin.
Now pour the sugar/pectin mixture into the fruit mixture and stir for three minutes.

 Ladle your super tasty jam into the plastic freezer jars, leaving about 1/2-inch of head space. The Ball freezer jars actually have a horizontal line on the side to make this extra easy for you.
This is what a full freezer jam jar with 1/2-inch of head space looks like. The lid sits down in the jar a bit so stick with the line on the jar and you can't go wrong.

Now screw on the lids, let the jam stand for about 30 minutes to thicken, then label and freeze! It's that easy : ) You should have five half-pints of homemade, all natural, yummy freezer jam.
Your freezer jam is good for about 12 months in a freezer maintained at zero degrees or lower. Not that your freezer jam is going to be in there that long because it is so darn good your family and friends are going to gobble it up real quick! I keep one in the refrigerator and then when I need another one I just take it out of the freezer and pop it in the fridge to thaw out. It's great on toast, bagels, on oatmeal, in ice cream or right off the spoon!
I enjoy interacting with my readers so feel free to leave comments or questions on my blog.
Be sure and share My Creative Mommy's blog posts with all your friends to help us grow, sign up as a member to follow my blog, and visit us on Facebook at http://www.facebook.com/MyCreativeMommy and click the "Like" button while you're there.

Many thanks to all my readers in the United States, Canada, Germany, Australia, the United Kingdom, Russia, France, Malaysia, Italy and the Bahamas!
My goal is to take the whole world on a creative journey one project at a time!

Many Blessings,

Jana : )