Tuesday, June 26, 2012

Pressed Flowers For Hearts And Crafts

Every morning as I turn the pages of my Bible, years of sweet memories come flooding back. I see little hands that I love, filled with wildflowers from a nature walk. Roses, lilacs and daisies from the many special moments spent with my husband. You see, the pages of my Bible are sprinkled with beautiful, colorful pressed flowers and petals that have captured time and become treasures in my heart.

When I press flowers between the pages of my Bible they are precious reminders that will stay there forever, and it doesn't matter how long it takes them to dry. But pressed flowers have many uses in the craft world, and sometimes you need them in a jiffy! For this week's project, I will be using the Microfleur Flower Press and my microwave to press lovely flowers from our yard. I will be using these pressed flowers in future projects like paper making, card making, and maybe even framed, pressed flower art.
There are several ways to press flowers. Placing them between the pages of a heavy book is probably the simplest, most popular way, but it can take weeks. The Microfleur Flower Press takes seconds in your microwave - that can vary a bit based on the power of your microwave and the moisture and thickness of your flowers, but still, it's darn quick. This method also tends to retain the color of flower longer.

If a Microfleur Flower Press is not in your budget right now (available from http://arnoldgrummer.com they're about $24.95 to $42.00 depending on size), I have read you can use two microwave safe plates, paper towels and blotting paper with fairly good results, though I have not tried it myself.
So over the next few days look a little more closely at the flowers around you - they're beautiful, and begging to be pressed into forever!
Many Blessings,
Jana : )


Friday, June 22, 2012

Hand Rolled Beeswax Pillar Candle


Today's project is fun, easy, and versatile. I chose to make an 8 inch pillar candle with red, white, and blue sheets of textured beeswax, accented with white stars for a patriotic theme for the 4th of July. The colors and cutouts could easily be changed for any holiday. Think red, green and white or gold with Christmas tree cutouts for Christmas, or orange and black with pumpkin cutouts for Halloween. My Canadian friends could make red and white with maple leaf cutouts - the ideas are endless. Making this candle doesn't require a lot of equipment or concentration. If you make a mistake, sheets of beeswax are flexible and forgiving. My little guy was talking to me non-stop the whole time I was working on this candle and I made a small error when measuring the red stripes. Once I realized what happened, I adjusted the rest of my measurements and everything worked out fine. Most craft supply stores carry candle making supplies, but sheets of textured beeswax may need to be ordered. My favorite source for candle making supplies is Candlewic Candle Making - Wholesale wax, wicks, molds, scents & more. Huge selection. Low prices.  These candles are beautiful home decor pieces, make gorgeous gifts, and sell well online and at craft shows. Go to http://www.etsy.com and search for beeswax candles to see for yourself!

Here's what you'll need to make your candle:
  • Beeswax Honeycomb Sheets
         White - 6 sheets
          Red - 1 sheet
          Blue - 1 sheet
  • #1 Candle wick; 10 inches
  • Ruler
  • Craft knife
  • Star shaped cookie cutter (or you can cut the shape freehand)
These first two steps build the foundation and are probably the most important part of the whole candle.
Let's begin by laying the 10 inch piece of candle wick down across the bottom of the 8 inch side of the first sheet of white beeswax.  Gently roll the wax sheet evenly around the wick so that it is pretty snug, and level at both ends.


Now continue rolling the wax until you get to the end of the sheet. You can roll and unroll as much as necessary to keep the candle snug, even, and level at both ends. When you reach the end of the sheet, grab the second white beeswax sheet and butt the new 8 inch end up against the old one. It doesn't have to meet perfectly as long as the emerging candle layers remain snug, even and level at the top and bottom ends. You repeat this step until you have used 5 of the 6 sheets of beeswax and you have a nice, fat pillar candle.

*Cutting tip - Beeswax is a bit sticky so you won't be able to cut it like you would paper or fabric. I kind of put the knife down and press, pick it up and move it, then press it down again. Once I've done that all the way down the length of the sheet, I gently bend the beeswax up and pull the piece away from the rest of the sheet.

Now take the 6th and final sheet of white beeswax and cut three strips 11/16" by 16 3/4".


Take the sheet of red  beeswax and cut three strips 3/4" by 16 3/4".


Take the sheet of Cobalt blue beeswax and cut one strip 4" by 16 3/4".


 Next, roll the strips in a level manner around the white pillar candle you rolled in the beginning, alternating red/white, red/white, red/white. Then roll the Cobalt blue stripe above the last white stripe. The length of the strips is long and they will overlap. Sometimes I have a little too much blue and it sticks up over the top of the candle. If that happens just take a ruler and measure the part that is sticking up, then unroll the blue stripe, cut that extra strip off and roll the newly measured strip back on the candle.
*Tip - Measure twice, cut once!


 Press the star shaped cookie cutter down on the leftover part of the sheet of white beeswax to make three star cutouts. Depending on the size of your stars, you can make as many or few as you want. Now stick the star shapes, evenly spaced, on the Cobalt blue strip at the top of the candle and gently press the stars so they adhere well to the blue beeswax stripe. Don't press so hard that you smush the honeycomb texture of the stars. Since beeswax is sticky, this shouldn't take too much effort.


Congratulations! You did it! You made a beautiful, hand rolled beeswax pillar candle! Sheets of beeswax come in all kinds of colors so once you get the hang of hand rolling sheets of beeswax, you can make votive candles, tapers and all kinds of fun shapes!


I never burn my patriotic pillar candle, it's just too pretty - but if you decide to light yours, remember *Never leave a burning candle unattended. Keep burning candles away from children and anything that can catch fire.*

Many Blessings,

Jana : )


Tuesday, June 19, 2012

Brain Overload and Beeswax Candles

A writer once said "...When I'm staring out the window, I'm working." That's me. My mind is constantly in motion. I admire people who can quiet their mind, or meditate on just one thing - I'd settle for three or four. I'm more like thirty things. Somewhere between 1:00am and 4:00am every night my brain goes on automatic defrag and begins dumping, creating, and reorganizing my thoughts for the next day, and the next ten years. As I've gotten to know other creative, and entrepreneurial minded folks I hear similar stories. Makes me glad I got all that extra sleep as a teenager. This all works in your favor though, because while I'm up trying to figure out how to feed all the starving children in third world countries, and how to keep the headliner in my car from falling down, I'm also thinking of ways to take the mystery out of creative projects to make them fun and easy for you!

This week's project is an 8 inch pillar candle, hand rolled with honeycomb textured sheets of beeswax. Perfect to celebrate The 4th of July, this beautiful do-it-yourself home decor piece is done in a patriotic theme of red, white, and blue. This candle project lends itself well to children too. They can help you roll the beeswax sheets, or make coordinating votive candles while you work on the pillar candle. Beeswax candles are easy to make, very attractive, and have a pleasant, sweet smell. They also make great gifts! My favorite source for candle making supplies is a company called Candlewic. Candlewic offers low priced candle making supplies and kits and you can click on the link below to check them out for yourself.  Stay tuned for this fun and easy project on Thursday!

Remember to "Like" us on facebook at http://www.facebook/MyCreativeMommy
      Candlewic Natural Waxes                      Many Blessings,
                                 Jana : )                                    

Thursday, June 14, 2012

Hard Candy Lollipops Are Easy!

Hearts, flowers and dinosaurs! Crystal clear hard candy lollipops, shiny red and loaded with sweet cherry flavor! Sound good? They are!  Today's project shows you how easy it is to make your own hard candy lollipops. Lorann Oils www.LorAnnOils.com is my favorite resource for all the lollipop supplies you'll need, and they even have an inexpensive kit to get you off to a good start.

Here's what you'll need to make your own hard candy lollipops:
  • Candy molds tempered for high heat.
  • Lollipop sticks
  • Candy thermometer
  • Flavoring, 1 dram
  • Sugar, 2 cups
  • Light corn syrup, 2/3 cups
  • Water, 1/3 cup
  • Liquid food coloring (optional)
Now that you have your supplies together, grab a large saucepan and in it you can mix together the sugar, corn syrup and water. Stir over medium heat until the sugar dissolves. Bring mixture to a boil without stirring.


When the syrup temperature reaches 260 degrees F, you can add color. Do not stir! The boiling action will incorporate the color into the syrup. If I am using a flavor that has a color, I pass on the additional coloring. That's what I did here. I used cherry flavoring and it was already red. It would have been more red if I had added additional color. Some flavors don't have any color, and in that case, I'd add some.

While you're waiting for the syrup to reach the perfect temperature, put your lollipop sticks in the molds so you are all set and ready to go. Kids like this part and it is safe for them to do.

 Remove from heat precisely at 300 degrees F. After the boiling action ceases, add your flavoring and stir. From about 220 degrees F to 300 degrees F will seem like an eternity. The first time I made my own hard candy lollipops I was certain the syrup would never get hot enough to reach the hard crack stage (300 degrees F). It does, be patient. When it hits around 280 degrees F, it happens quick so be ready.


Carefully pour syrup into lightly oiled molds (***syrup is nearly as hot a molten lava - keep the kids away and be careful yourself!***). Once you have poured the syrup into the molds, I like to make sure the sticks are completely covered, so twirl them and dunk them down some if needed.
There have been times where I have forgotten to oil the molds and the lollipops came out fine, although they needed some gentle encouragement. So don't panic if you forgot this step.


After a while the syrup you poured will cool and harden, then you can pop the lollipops out by gently pushing from behind the mold. You'll see where they are lifting off and where they may be sticking a bit.


Now be happy. You just made your own hard candy lollipops! Congratulations!

This project is a great opportunity to teach your children a little science too. They are probably in the kitchen waiting as patiently as they possibly can for the yummy end result, so it's a good time to show them how solids become liquids, and then liquids become solids with heating and cooling! And you thought lollipops were just empty calories.

Many Blessings,
Jana : )


Tuesday, June 12, 2012

Sucker For Sweets

When I'm learning something new and challenging, I try to find that same information in a children's book and begin there. In a children's book I can see the basic concepts of something, simply stated. It may sound silly, but it works. When I want to learn a new craft, I often start with a kit. I love kits. They give you the basics and include just about everything you need to get off to a good start, quickly. And if I find it's not my thing, well, I haven't made a big investment of time or money. One of my favorite kits is from https://www.lorannoils.com  Lorann Oils is a wonderful company celebrating 50 years of business this year. I have used their candy making supplies over and over with great results. On Thursday I'll be posting how to make your own hard candy lollipops, and Lorann Oils offers a great kit that contains grape and watermelon super strength flavors, 25 sucker sticks, 2 reusable molds tempered for high heat, and 2 packets professional grade powdered corn syrup for $10.95. All you need to add is the sugar, and I highly recommend you get a candy thermometer. You can order one from Lorann Oils ($4.25), or pick one up at your local grocery store or craft supply store.

Making your own hard candy lollipops is easy, fun and tasty. The shapes and flavors are endless, and they make great, inexpensive party favors too!  I haven't met a kid or grown-up yet that doesn't smile when you hand them one.  Let's face it, lollipops are happiness on a stick.
Be sure to go to My Creative Mommy's facebook page and vote on a flavor for this week's project. http://www.facebook.com/MyCreativeMommy
Stay tuned for Thursday's DIY hard candy lollipop blog post at http://MyCreativeMommy.blogspot.com

Many Blessings,
Jana : )

Thursday, June 7, 2012

Post-It Note Books You'll Love

I don't have a stellar memory so Post-it notes are a way of life for me. What I do have, is a love of books. I am a book enthusiast. I enjoy reading books, writing, buying, selling and collecting books, and I love making books. When I came upon a way to make Post-it notes into a little book, I was delighted.
Arnold Grummer, master of all things paper making and paper crafting, offers an inexpensive, fun and easy way to get started making your own sticky note notebooks at http://arnoldgrummer.com

These are great gifts for men or women, super stocking stuffers, teachers, nurses, and office staff everywhere appreciate them. They sell at craft fairs, and online at websites like http://www.etsy.com priced anywhere from $3.00-$20.00+ depending on how fancy and embellished they are. They keep your Post-its safe and warm, travel well, and are refillable (glue stick required).

Here's what you'll need to get started making Post-it Note Books:
  • 2 pieces of light-weight scrapbook paper - not heavy, thick or card stock because it needs to bend easily without buckling or gapping.
  • 3"x3" Post-it notes - 100 note size
  • Glue stick 
  • Scissor
  • Book board or something similar to it for hard cover.
  • Templates
  • Pencil 
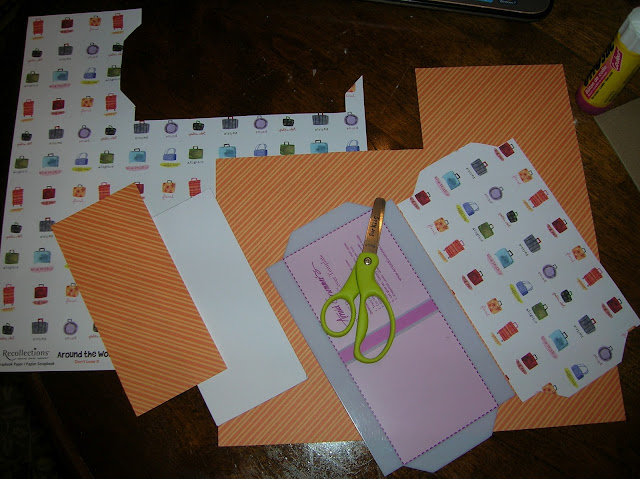
Next you trace the book cover template and the book liner template on to the back of the corresponding scrapbook paper, then cut out the book cover and liner.
*Tip - I usually trace a few at a time and cut them all out at once so I can make several books at one time.
Apply glue using a glue stick to the entire surface of one side of one book board and place it glue side down on the blank side of the book cover paper as shown. Now do the same thing to the other square book board. When the two square book boards are in place it will be easier to properly place the glued book board spine in the middle of them. Then gently flip the whole thing over and smooth the surface with your finger to even out the glue.
*Tip - Put some wax paper, or a paper towel under your project to keep glue off your table.

Now apply glue stick to the two long flaps first (one at a time) and fold them over the book boards. Run your fingernail down the length of the edge and smooth over the paper with your finger. Next, do the same thing to the short sides.


You can now apply glue to the entire back of the rectangular paper book liner. Then center it glue side down over the unfinished side of the cover. Glue doesn't set up quickly so you can move it a bit if needed. Then smooth over with your finger. Let the glue dry for a bit then gently score the joint on either side of the spine with your fingernail - paper should NOT gap at the top and bottom when you fold the book cover. Wow, your little book is taking shape! 
You're almost done! All you have to do now is cover the back of the Post-it pad with glue, or double sided tape and center it on your right hand side, close the book and put it under something heavy for a few hours, or overnight till the glue is dry.


Congratulations! You just made a book!

Have lots of fun and let your creativity run wild with this project. Feel free to embellish the cover, pick any and every color and design of scrapbook paper, and involve your kids if you have some hanging around - they love to trace and glue!

Visit us on Facebook at http://www.facebook.com/MyCreativeMommy and click the "Like" box to become a fan and receive regular updates!

Follow us on Pinterest at http://pinterest.com/mycreativemommy


Many Blessings,

Jana : )


Monday, June 4, 2012

On Your Mark! Get Set! Go!

I love to learn. Actually, I think I'm addicted to learning. I am constantly seeking knowledge. I'll read the back of a shampoo bottle if there is nothing else to read nearby. In the craft world, that love of learning can be a blessing and a curse. Once I master the mystery of how to make something, I'm on to learn something new. My husband is a bit perplexed by this, maybe in part because it's hard to keep up. My kids happily endorse my need to create because it means lots of trips to Hobby Lobby and Michael's, and fun projects they can help with. Over the years I continue to use all the skills I've collected, some more than others, but I enjoy them all.

The purpose of this blog is to take you with me on this creative journey, and inspire you to get creative too! They'll be plenty of easy projects and maybe a few challenging ones. I'll be sure and give you resources and pictures with each project.  Many of the the skills I'll be featuring are more than just fun, they are life skills. It is very rewarding, and confidence building to make something yourself. And it doesn't end there. These are useful things for your own home, or someone else's. They all make great gifts, or if you could use some extra cash, you can sell them. Selling handmade items online is a growing, global opportunity like never before. So get ready because we've got a lot to learn, and it's gonna be so much fun, wait and see!
"Like" us on Facebook at http://www.facebook.com/MyCreativeMommy

Here are a few of the projects I'll be posting about:

Hand bound books and bookmaking                               
Paper making                                                                   
Paper crafting and cards                                                  
Baking, cake decorating and candy making                   
Drying flowers using a flower press                                              
Homemade lip balm                                                        
Soap making                                                                    
Cookie and soup mix jars                                                
Homemade dog treats                                                      
Sewing projects                                                               
Quilting                                                                            
Healthy cooking                                                              
Handmade jewelry                                                          
Mosaic                                                                             
Basket weaving                                                               
Canning and preserving                                                  
Gardening
Wreath making
Silk painting
Marbling                                                                     
Gourd birdhouses
Herb salt & vinegars
String angels
Fabric flowers
Dried fruits & herbs
Flavored oils
Candle making
Paper & Fabric beads
Painting
Arts & Crafts for children
Diaper cakes
Holiday projects & gifts
Bath salts, scrubs, & teas

...and anything else I can think of (maybe a few of your ideas too!). So stay tuned for my twice weekly blog posts, one to introduce the project and one for the project itself : )